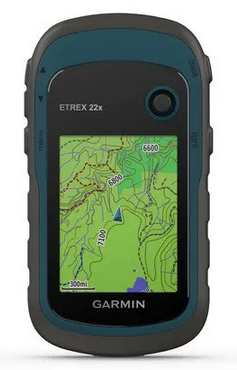
Difference between revisions of "Garmin eTrex 22x GPS"
From MEFD
(add picture of gps) |
Zarvanitis (talk | contribs) (Link OTH med bag inventory) |
||
| Line 1: | Line 1: | ||
We carry Garmin eTrex 22x GPS in each of our | We carry Garmin eTrex 22x GPS in each of our [[Over the hill bags]]. They are to be used in locating patients with known coordinates and providing coordinates to other rescuers when patients are found. | ||
[[File:Garmin eTrex 22x.png|thumb]] | [[File:Garmin eTrex 22x.png|thumb]] | ||
Latest revision as of 00:36, 19 September 2024
We carry Garmin eTrex 22x GPS in each of our Over the hill bags. They are to be used in locating patients with known coordinates and providing coordinates to other rescuers when patients are found.
Basic Operations
Power on and off
- Press and hold the power button for 1-2 sec.
Go to map mode
- Select ‘Map’ from the main menu. Map will snap to your position once satellites have been found.
- Use arrows (top-left) to zoom in and out.
- Use thumb stick to move around the map.
Get current coordinates
- From the map screen press and hold the thumb stick. This will start the ‘create way point’ function and display current coordinates.
- If you are exploring the map (arrow is displayed) press back button first otherwise coordinates will be for arrow and not for you.
Go to coordinate
- From the map, press the ‘Back’ button to get to main menu if necessary.
- Select ‘Where to?’.
- Select ‘Coordinates’.
- Enter coordinates using left/right arrow to move between digits.
View current route on map
- The GPS will automatically record your track as soon as it connects to the satellites.
- From the map, press the ‘Back’ button to get to main menu if necessary.
- Select ‘Track Manager’.
- Select ‘Current Track’.
- Select ‘View Map’.
